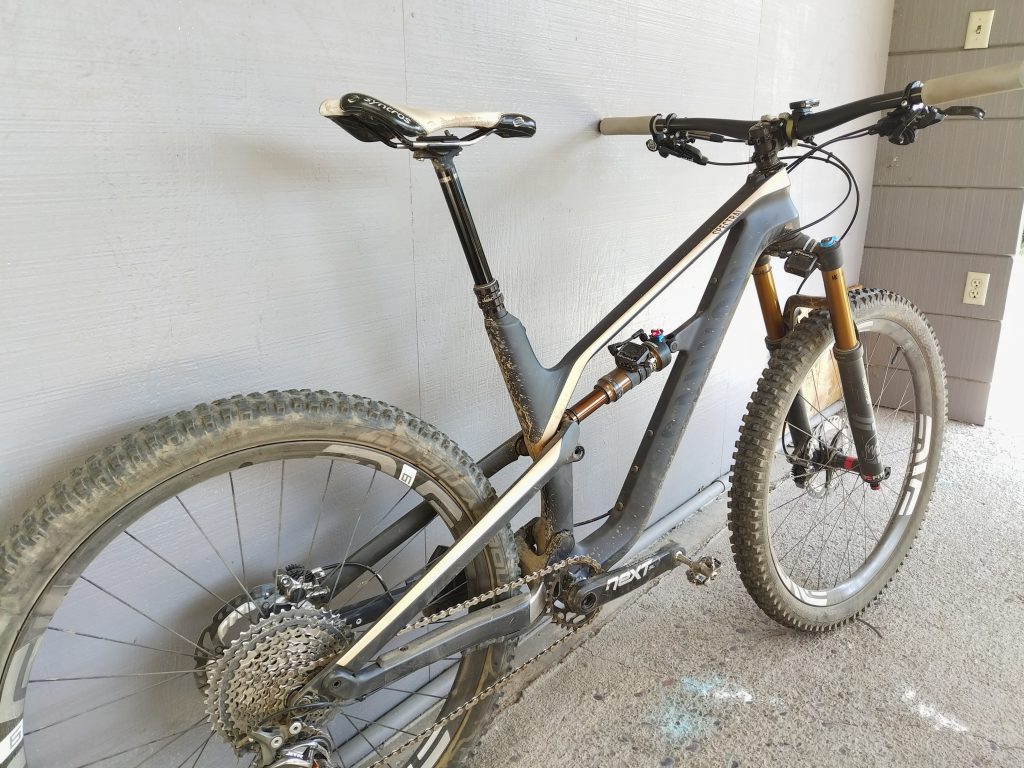
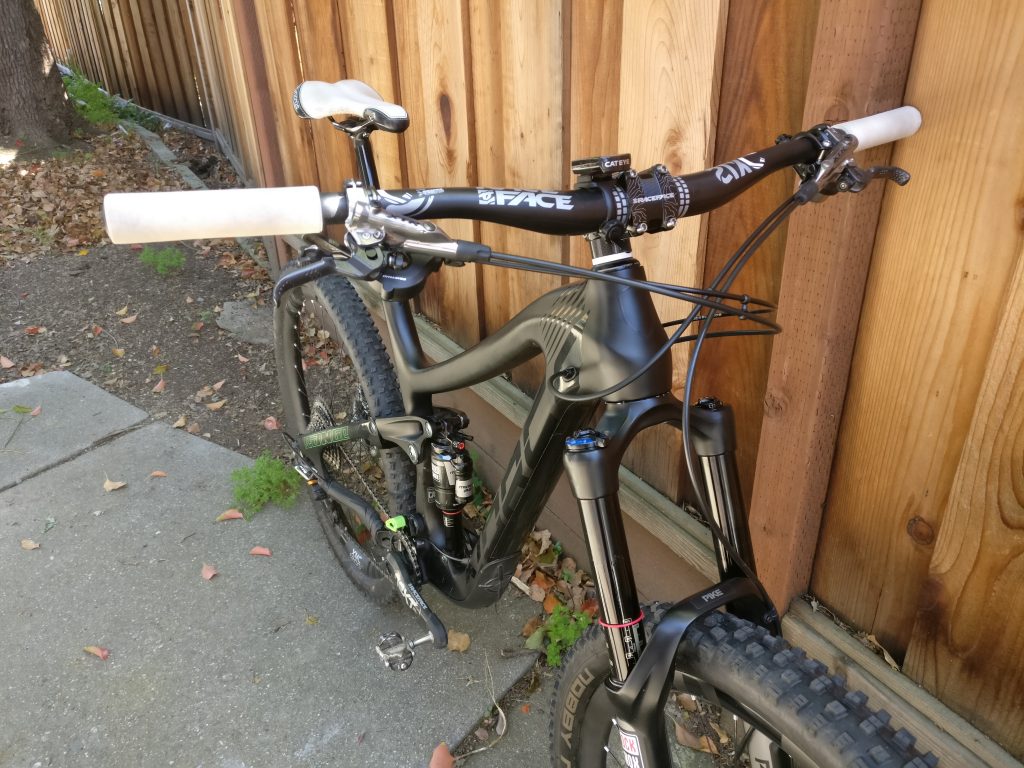
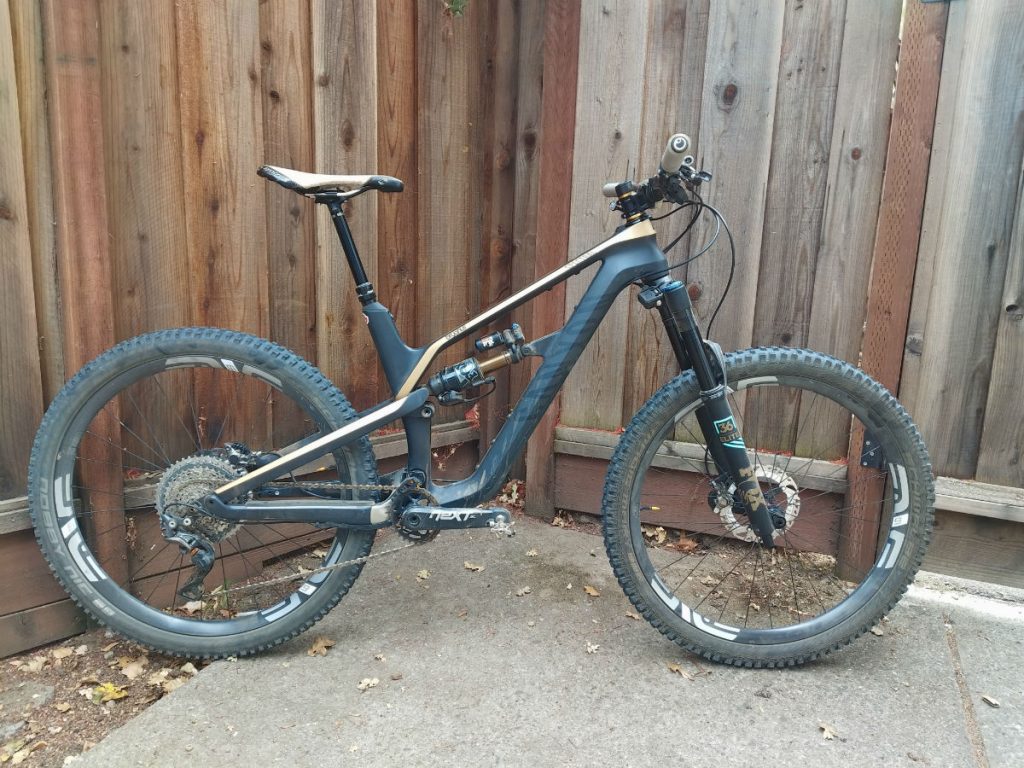
2018 Canyon Spectral CF 9.0 LTD

New bike time!

After barely a year with the Norco Range, I got a hit on one of my ebay searches for another bike on the wishlist. I’ve read great things about Canyon’s Spectral, but they’re very difficult to come by in the States as they are a German brand that didn’t have a U.S. sales outlet until late last year, when they launched their direct-to-consumer model in the U.S.A (similar to YT Industries).

A few emails back and forth with the seller, an offer was made, and the bike arrived a few days later!

The Spectral is actually the first, brand new complete bike that I’ve ever purchased! The only other bike I’ve bought new was actually just a frameset: my beloved ’93 GT Zaskar LE (post coming soon!).
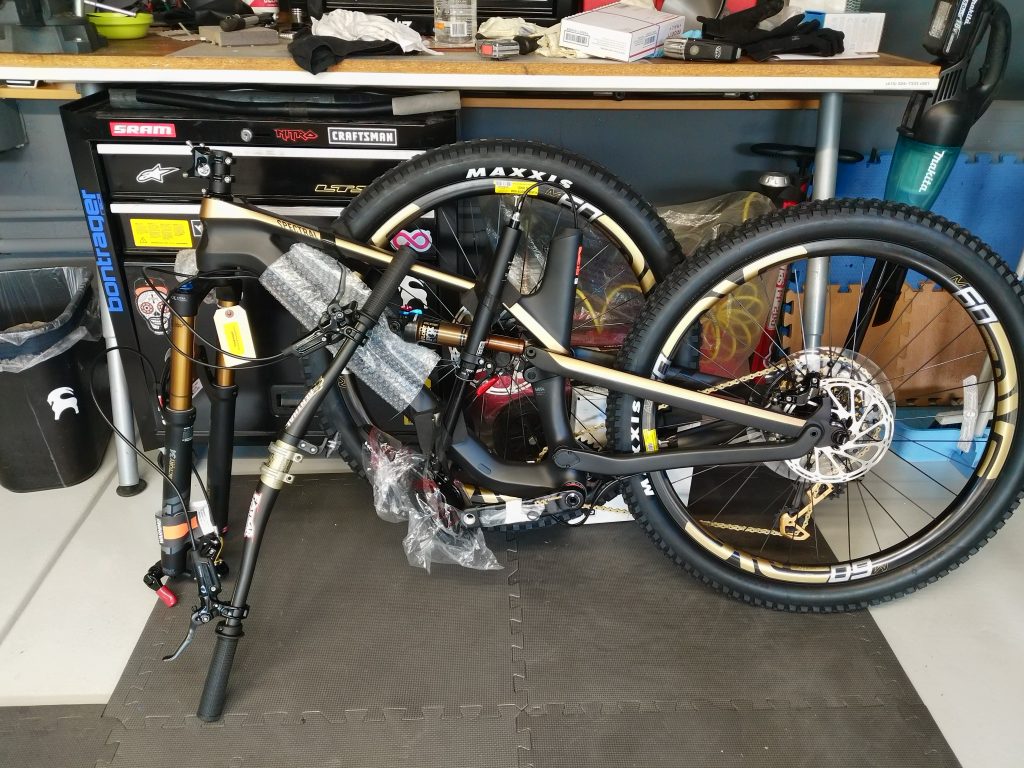
This Spectral CF 9.0 LTD is their top-of-the-line trim for 2018, retailing for $7K(!). Even at that price it’s a relative bargain considering the spec sheet. I think a similar build from Trek or Specialized (or any dealer supported brand really) would probably top $10K!

It came oozing with FULL [Gooold!] Sram XX1 Eagle, Ultimate brakes, Enve m60 HV’s with Chris King boost hubs, and ultra-wide Maxxis DHF/Rekon 2.6 rubber. Not to mention Fox Factory suspension front and rear, a blingy Renthal cockpit, and a 150mm Reverb to complete the build.

Of course, I had to do what I do…and part all that shit out and swap in the XTR stuff from the Range. I’m a Shimano guy, what can I say?? Plus the parts on the Spectral were worth quite a bit, which I wanted to take advantage of and offset my costs as much as possible.

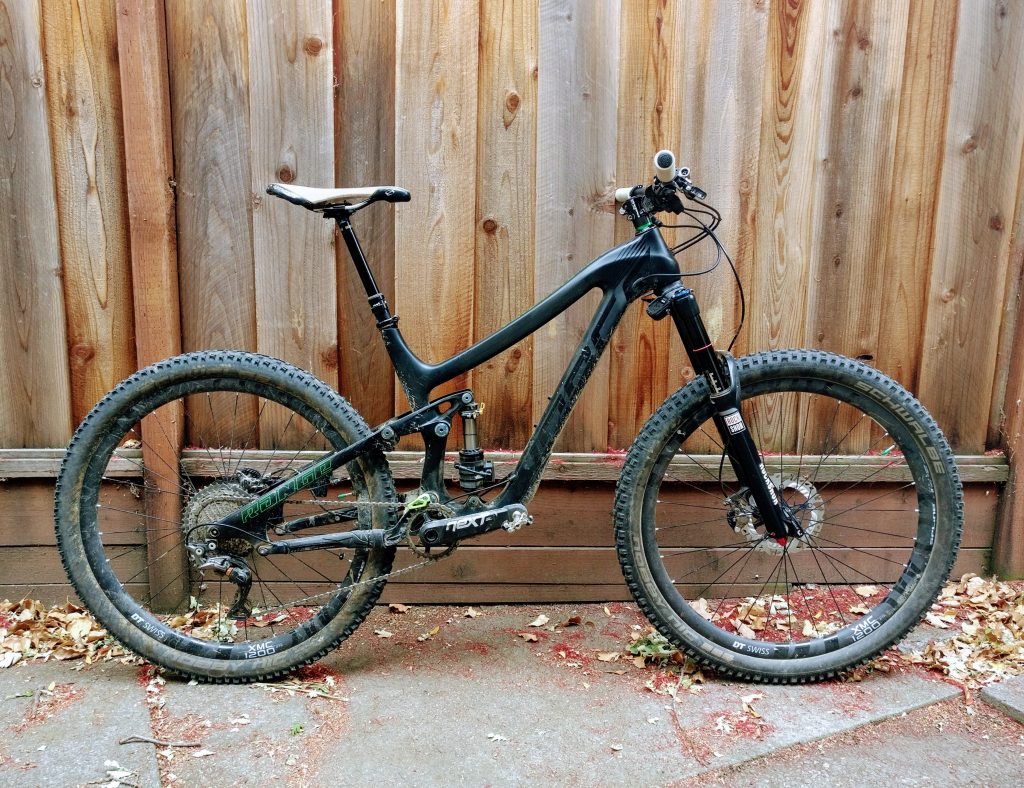
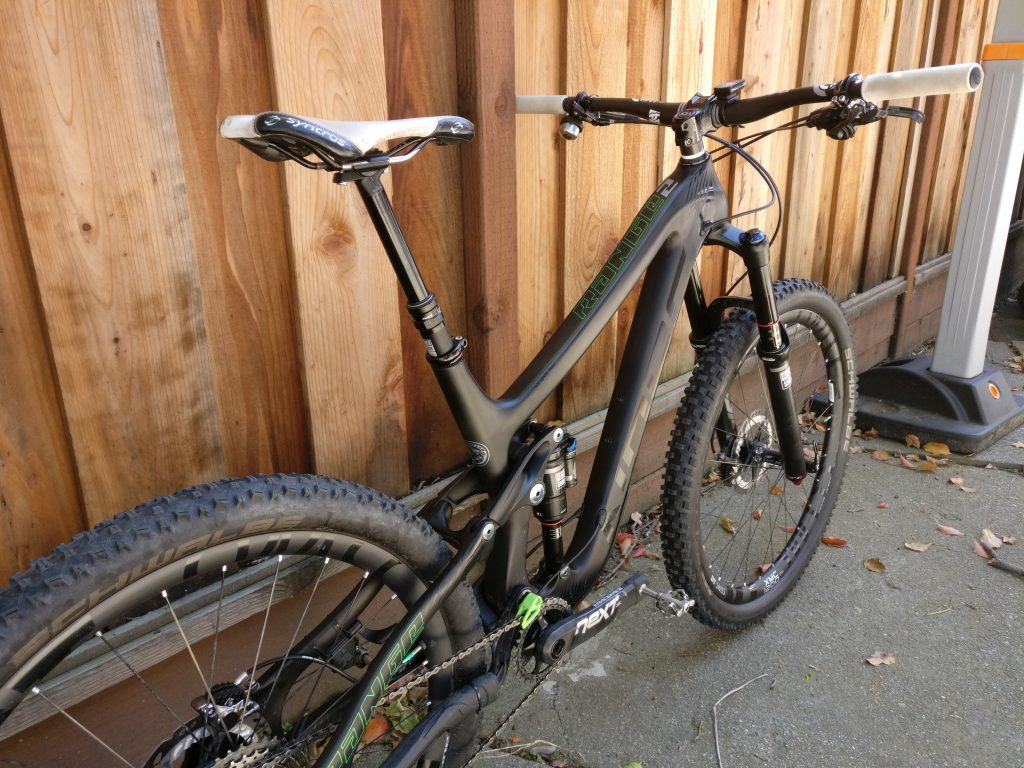
Here’s what I ended up with:
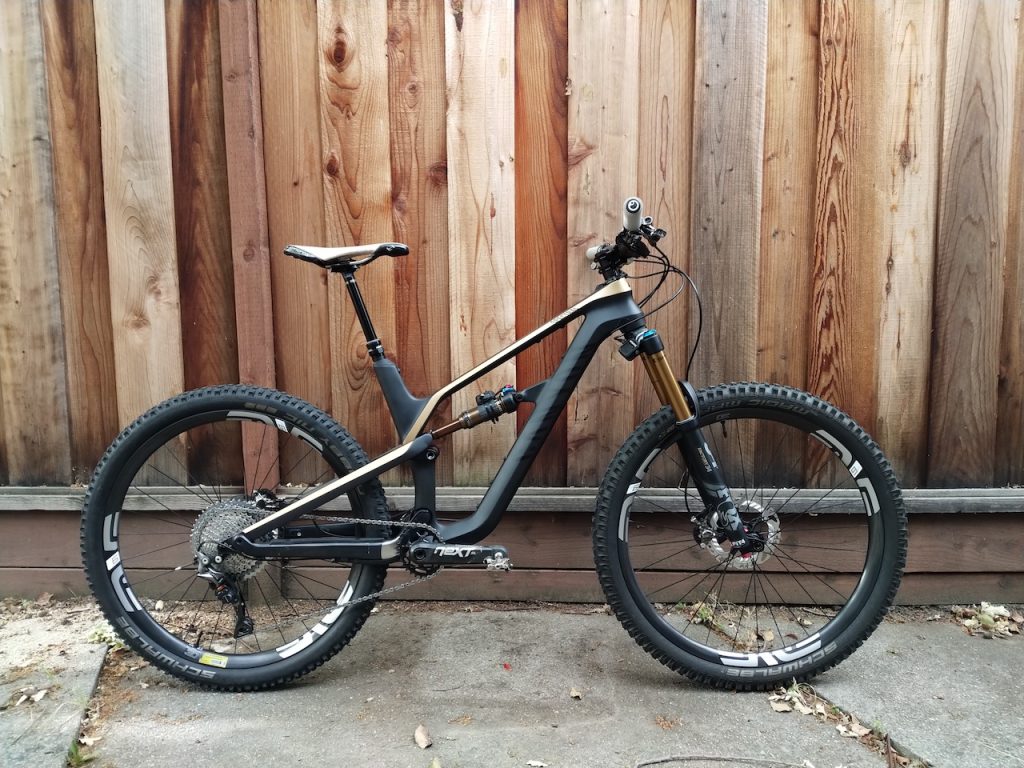
The only stock parts are the frame/fork/shock, Renthal cockpit, and headset! After much deliberation, I even swapped the enve m60/King wheelset for a set of the new enve m630’s (30mm internal) on DT 240s. They’re lighter (only 1420g!), wider (30 vs 24mm) than the HV’s they replaced, and also use my favorite DT 240s hubs! Don’t get me wrong, I love Chris King, but the 240s are way easier to maintain, are super smooth, and also come in my preferred centerlock rotor mounting interface! Who can knock on Shimano’s XTR Ice-Tech Freeza rotors! They’re the best and only come in centerlock!

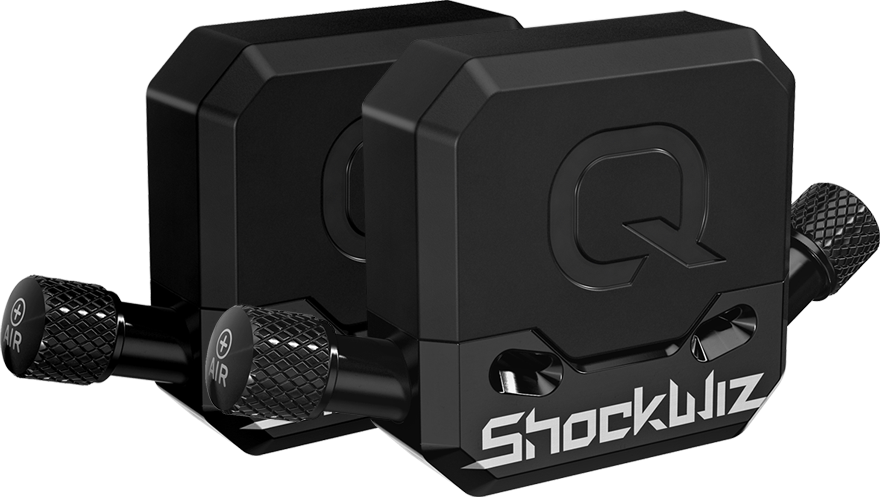
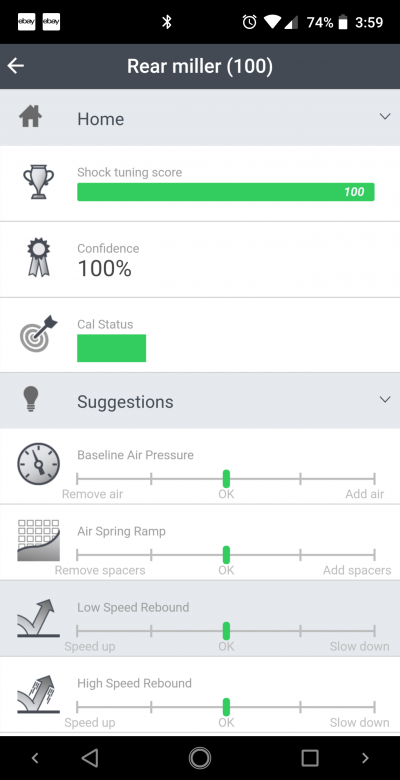
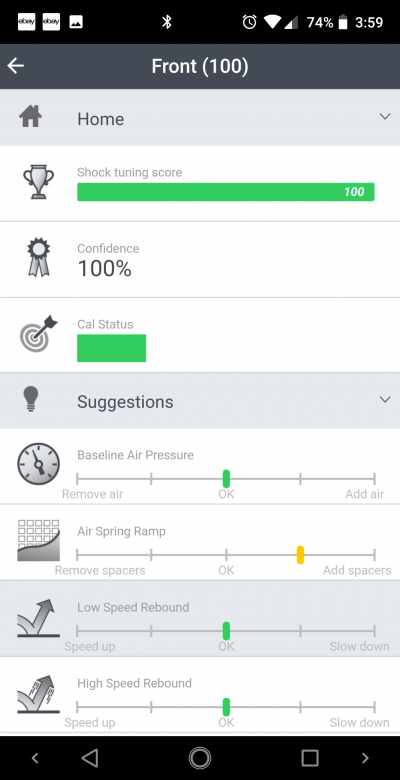
So far, I only have a handful of rides on the Spectral, but man is it fun! It’s a little lighter than the Norco, but very flickable and super agile. It definitely climbs better, but I have missed the 160mm travel of the Range a few times here and there. But overall, I think the 150/140mm setup of the Spectral is very well-suited for most of the Bay Area trails I frequent the most. And thanks to the ShockWiz, I managed to achieve perfect 100 scores on both the Fox 34 and DPS rear shock.
The size Medium I have has a reach that’s the equivalent of a Large in the ’15 Norco Range. I am right on the edge of Canyon’s sizing chart between Medium and Large, and I think the Medium is perfect for me.

I also downsized the Maxxis 2.6 tires to my previous Schwalbe Magic Mary and Nobby Nic combo, which I like a lot. I’m not ready for 2.6 (yet)! I still have the tires, though, so maybe I’ll give them a whirl when the Schwalbe’s die.

Speaking of which, the Nobby Nic suffered a few pinch flats while on the Norco that have been bugging me. I scored some of the new Slime Premium Tubeless sealant at Sea Otter and had high hopes for the stuff, but have been totally let down by its performance. I haven’t been able to get the pinch flats or even tiny holes to seal up with the Slime, even after pushing in a few plugs on the larger holes. I’m really surprised. The rep at the booth had a nice demo and it looked very promising, with their long-lasting [tire] “lifetime” expectancy. I think the issue is that the Slime is kind of thick and doesn’t flow like Stan’s does, so it isn’t able to plug holes as quickly. On my last ride at Joaquin Miller, I was pumping my rear tire after each loop!

When I got home, rather than ditch a perfectly good tire, I decided to install a Cushcore tire insert into the rear (I had scavenged a set on a recent parts swap). Yes, it was as horrible as everyone says it is to install. But I got it in there! And while I was at it, I mixed in some Stan’s sealant with the Slime, and it plugged up my pinch flats instantly! Sorry Slime, I tried, but you failed me. I’m going back to Stan’s.

Current build: 27.42lbs incl. rear Cushcore insert and pedals…so probably 26.5 without? Not bad.

Anyway, that’s all for now. I’ll update later with some more ride reports…

2019 Updates:

In my quest to push this bike a little bit further, I swapped in the 2019 Fox X2 rear shock with the 65mm stroke (vs 60mm stock length). That increased the rear travel to about 152mm (best guess). The front got a similar upgrade with a 2019 Fox 36 Performance with 160mm travel and the GRIP2 damper.

Canyon also seems to think this bike can go bigger, as their 2019 Spectral LTD is now spec’d with 65mm stroke rears (for advertised 150mm rear travel) and 160mm front travel using a Fox 36 Factory fork.

I was also happy to discover that it is possible to mount a chain guide to the Spectral using an e-type guide. Canyon provides a special adapter to mount an e-type front derailleur to the rear chainstay:
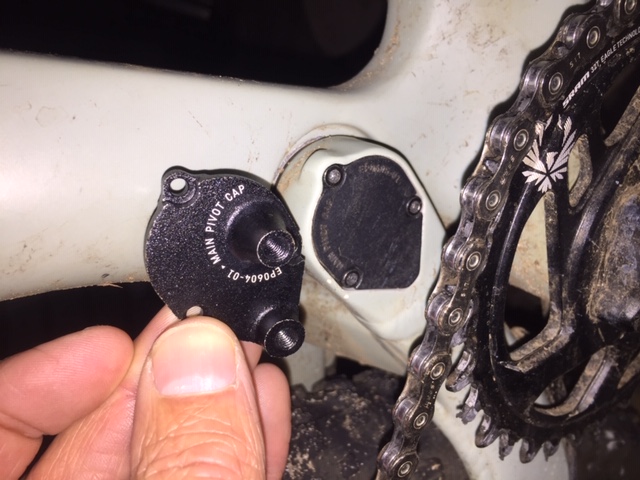
My bike didn’t come with it, so I contacted Canyon and they sent me one. I installed a FUNN e-type guide, which says it’s not compatible with Oval rings, but it fits perfectly with my AbsBlk oval ring and works great:
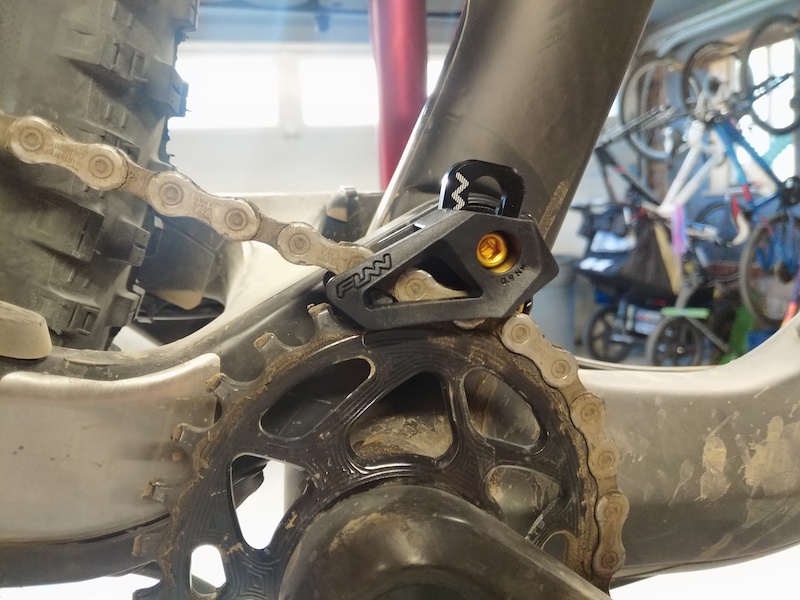
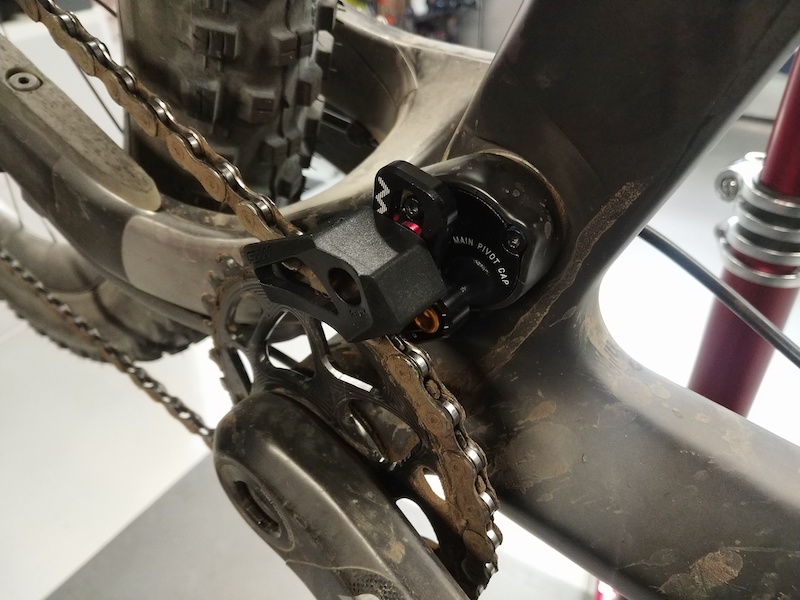
Here she is in all her upgraded glory!
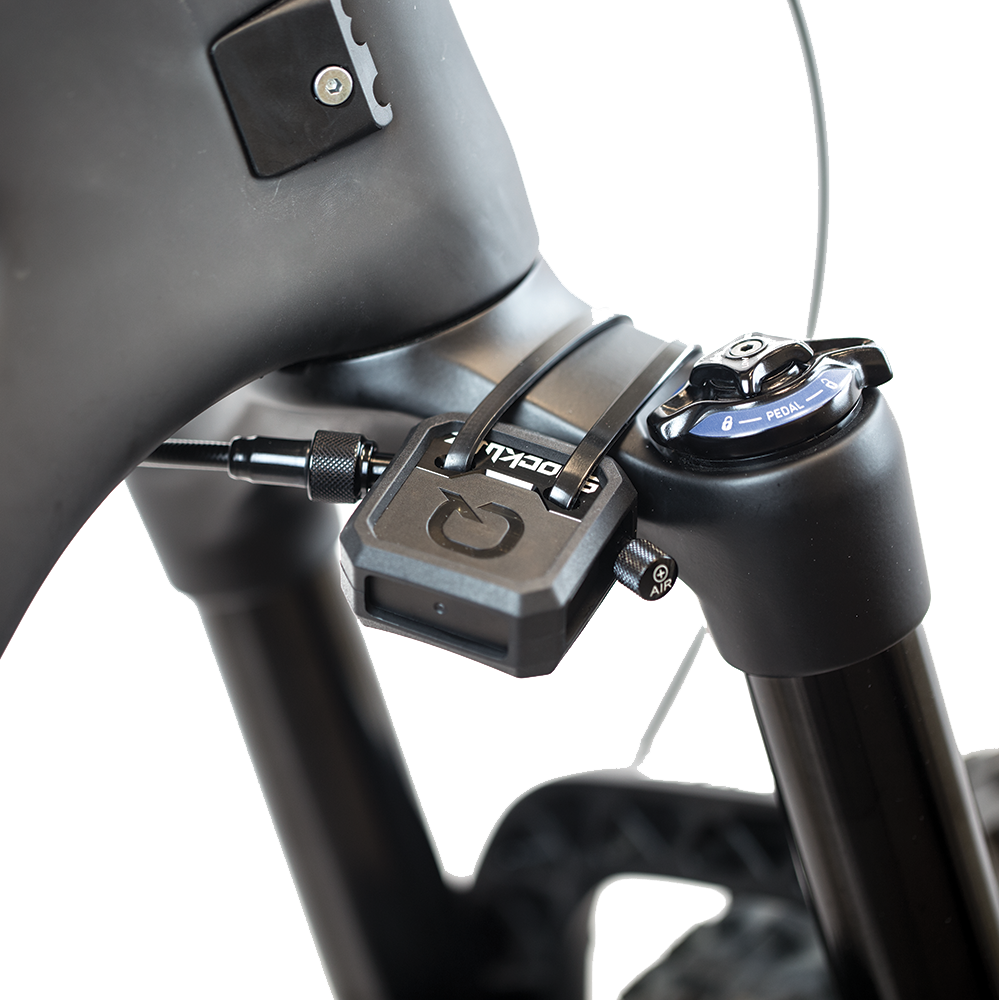
And for anyone trying to figure out how to mount ShockWiz to the X2, here’s how to do it:
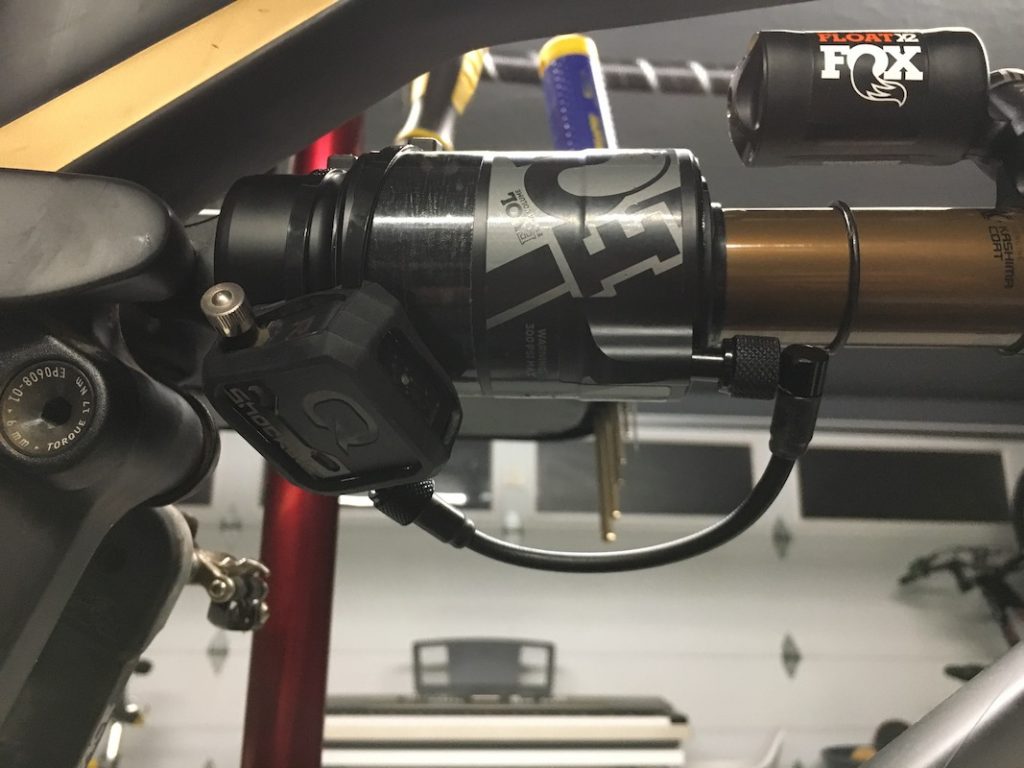
Read more about this solution over at FeelTheBerm.com and rent your ShockWiz, too!


The Best Bicycle Bell for 1x MTB Drivetrain and Remote Dropper Post Lever Setups

With the movement to 1x drivetrain setups with left-hand dropper post remote levers, I’ve found it difficult to find a bell that mounted to my cockpit in a way that was easy to access and ring, without taking my hands off the grips or having to unwrap my thumb, etc.

Previously, I had used a Mirrycle Incredibell Brass Duet Bell (~$10 from Amazon; Warning: if you buy this bell, be sure to buy from a REAL bicycle shop such as “Trail This”, as many of the ones listed are fakes made in China ~$2, while the genuine product is made in Japan). The bell also has a very loud and long ring tone, which rings both on the initial push and also on the return of the lever, so 2 pings per push (“Ding-ding”!).

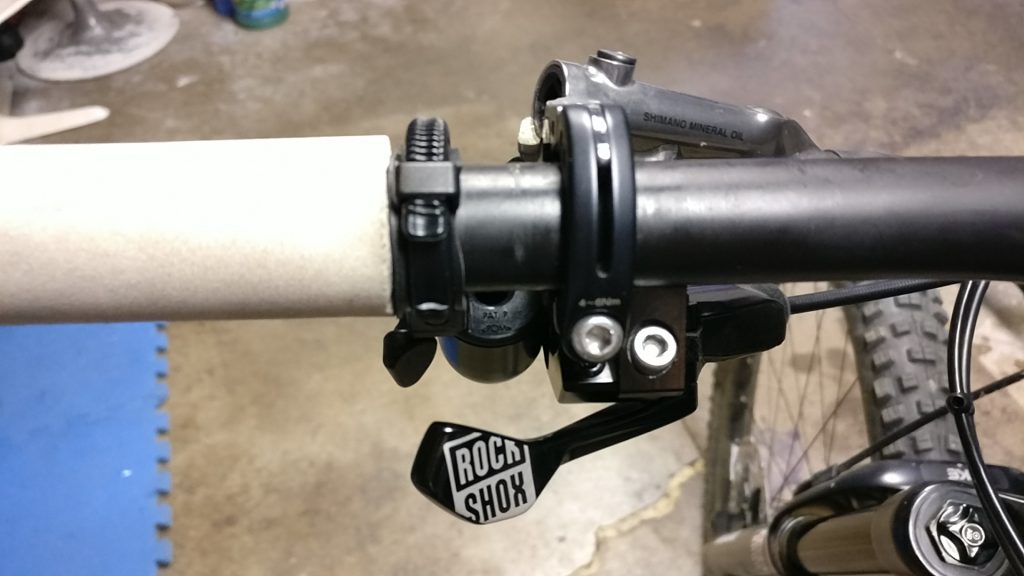
I mounted the Duet bell upside-down on the left-side, situated where my index finger would normally hit the release trigger for the front derailleur shifter. When used in conjunction with my RockShox Reverb plunger-style remote (right-hand remote, mounted upside down on the left-side and actuated by my thumb), this setup worked great and was very ergonomic.

But when RockShox came out with their new 1x remote lever, I upgraded to that style remote and actuating it collided with the bell!

After a bit of searching, I finally found an underbar-mounted bell that works great for today’s 1x setups and underbar dropper remote levers.

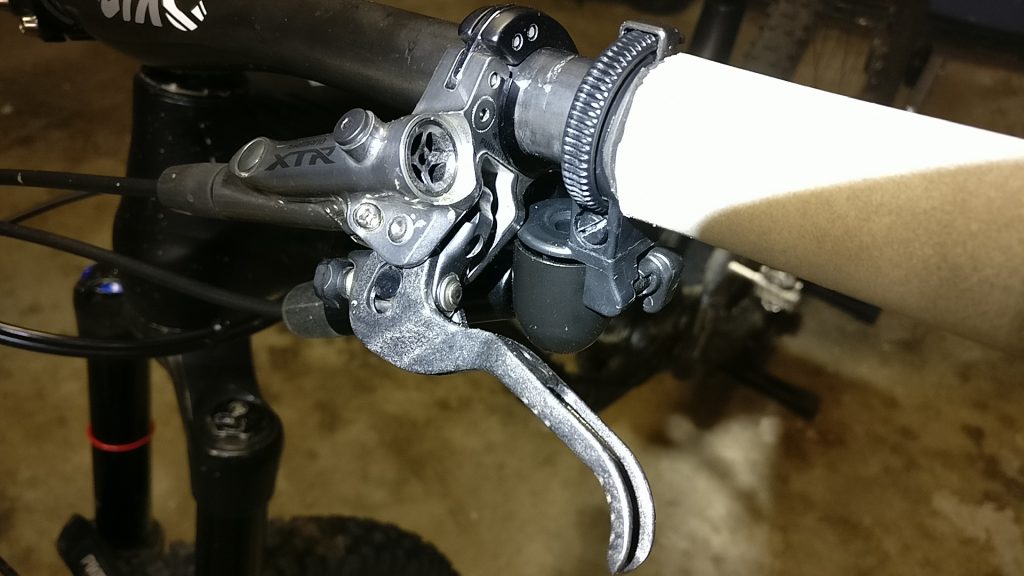
And here it is. Ta da! Trigger Bell!

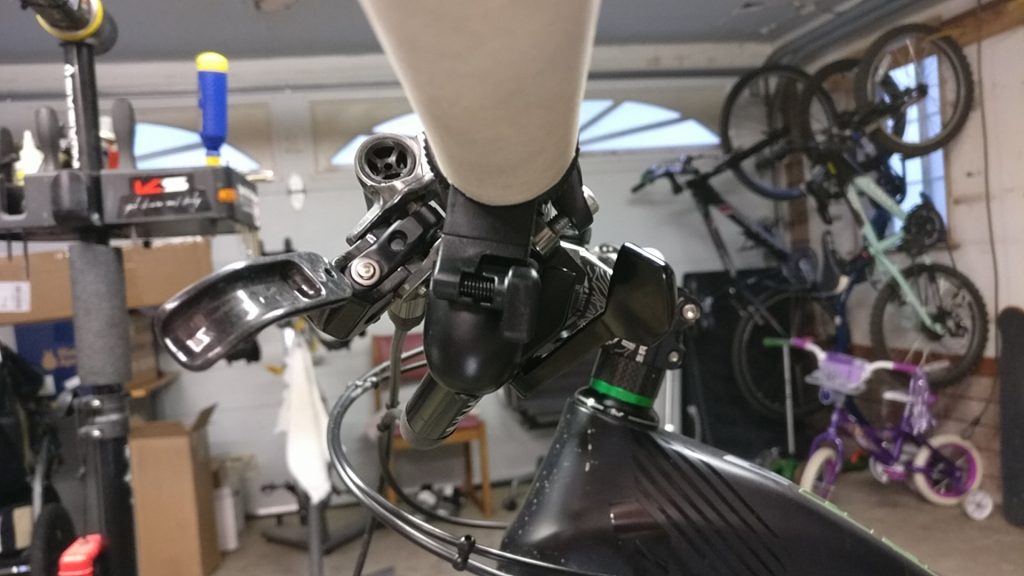
The bell is designed to be flicked by your thumb, allowing your hands to be fully wrapped around your grips at all times. There are several mounting positions, but for a 1x setup, this is how to do it. The Trigger Bell mounts beneath the brake lever and in front of the dropper remote lever. It doesn’t interfere with any brake or remote lever actuation, nor does it interfere with my fingers or grip.

And get this: You can even ding the bell while braking!

Note: Usually, it mounts to the outer 1/4″ of the grips, but my grips were cut short by that much for my previous bell setup, so I used a piece of rubber to mount the Trigger Bell where it was supposed to go.

While not as loud as the Duet bell it replaced, it is still plenty loud for trail riding and alerting hikers, etc. And I really like the ergonomics and using my thumb to ding it. If you have a 1x setup and are struggling to find a bell that works with your underbar dropper remote lever, try the Trigger Bell! Best part? It’s only $12.99 at Amazon!

Shockwiz Rentals Now Available!

TL;DR Check out my sister website at FeelTheBerm.com for more details, pricing, and to reserve a set! Rent a ShockWiz today! Renting Nationwide!

ShockWiz is one of the most innovative products to come to the MTB market and the information it provides about your setup is invaluable. Take out the guesswork and remove the technical barrier behind suspension setup. Stop tinkering with your suspension and push your ride to the limits instead. Sign up now to reserve your rental!

What is it?

ShockWiz is a suspension tuning system for air-sprung mountain bikes that combines high-tech hardware with an intuitive smartphone app. Lightweight, durable and powered by a long-lasting coin cell battery, ShockWiz automatically records and evaluates suspension performance every time you ride. The ShockWiz app displays straightforward adjustments that unite bike, terrain and riding style.

ShockWiz works for all mountain bike riders, regardless of their experience or bike’s intended use. It works on hardtail and dual suspension bikes, and for all levels of skill, speed and terrain.

With ShockWiz, you know exactly how your suspension is performing – and how to make it better.

Features & Benefits

  • Automated tuning recommendations.
  • Shock tuning score — a snapshot of how well your suspension is set up for you.
  • Works on hardtail and dual suspension bikes. Works for Cross-Country, Trail, All Mountain and Downhill.
  • Inexpensive, replaceable CR2032 battery lasts for months.
  • Waterproof and dust proof — IP67 rating.
  • Two alternative hoses (included) offer a range of fitting options.
  • Smartphone app is compatible with Apple and Android phones.

Essential Details

  • ShockWiz is designed for all mountain bike riders, regardless of your experience or bike’s intended use.
  • You can tune for every riding style: Efficient (pedaling), Balanced, Playful or Aggressive.
  • Advice for air pressure, spring rate, compression and rebound is displayed in the intuitive smartphone app.
  • In the box: ShockWiz hardware, front and rear-specific hoses, rubber mounting boots and zip ties.

SOUNDS AWESOME! How much do they cost?

SRAM has priced the Shockwiz at only $399 USD EACH!

Uh, I think I’d rather rent them!

Good thinking! Check out my sister website at FeelTheBerm.com for more details, pricing, and to reserve a set! Rent a ShockWiz today!

2015 Norco Range C7.2 Carbon

Just picked up this bad boy.

I’ve had my eyes on Norco’s Range and Sight models for a few years now, but they are pretty hard to find locally. eBay is also very sporadic and usually they are located in Canada, so shipping stateside is an issue. But I finally found one and the price was right so I took a chance on it.

The NorCal rain has been terrible for riding this year; it’s literally been raining every weekend (I’m talking torrential downpours!) and the trails are just a muddy mess. In fact, I’ve only gotten in 3-half rides since last December! And each time I had to turn around because my tires were so muddy or trails were closed off.

Unfortunately it had some issues: The Pike was super low on air pressure (~10psi), but was very difficult to compress. Pumped up to my normal 50psi, it was basically locked out! Then there was the Reverb. The remote button was completely loose, with no signs of resistance/actuation,  and the post was stuck ‘up’.

Luckily, a teardown of the Pike and a lowers service with new oil fixed the pressure problem. I think the previous owner botched a service attempt and managed to create some sort of imbalance in the upper and lower air chambers, when they should have self-balanced themselves. In any case, the Pike is working perfectly again.

As for the Reverb, I took a chance on a bleed kit and it turns out that the previous owner botched a bleed attempt, leaving very little fluid in the line as well as a lot of air. In fact, the bleed screw on the remote was inserted upside down with the pointy end sticking out! After bleeding the line, the Reverb is back in action.

This is my first frame with internal routing throughout, so swapping parts from the Carbine was a little painful. Luckily I’d seen some YouTube videos of how others route cables and used the existing cables to pull a length of string through the cable ports. I’m pretty sure that without existing cables to work with, routing the cables would make me cry.

Another issue was that I had to get a new rear brake line because my existing one was a couple inches short for my liking. That meant a full bleed as well. On my first attempt the lever was waaay too stiff. Turns out I hadn’t pushed the pistons into the caliper body far/hard enough.

And while the stock Pike RC had the same overall functionality of my Pike RCT3, I liked the overall condition of my RCT3’s, so I swapped the charger dampers and travel shafts between the two forks.

The Range is now ready to rumble at a relatively light (for an Enduro bike) 26.95lbs (without pedals). Since this posting, I’ve swapped the Monarch Plus with a CCDB Inline shock and put a Magic Mary 2.35 Evo up front, moving the Nic 2.35 to the rear. As you can see, I’ve also been tuning the bike with the help of the ShockWiz both front and rear. These things are game changers. If you’re interested in renting some for your bike, check out my ShockWiz rental post!

Englund Total Air Cartridge Replacement Seals Kit For RockShox Judy XC, SL, FSX, SID, White Brothers

Brand new, never-used replacement Seals Kit for Vintage Englund Total Air cartridges!

2024 Update: Kits for both cartridge types are AVAILABLE!

Fits vintage Rock Shox Judy XC, SL, SID and White Brothers (Bros.) forks that
used the Englund Total Air cartridge kit.

**One Kit will replace seals in two cartridges (enough for one fork)**
** Buy with confidence! This is a Brand New seal kit, not 20+ years old!  ** I have the Original, MASTER Spec List for the seals used in these cartridges!


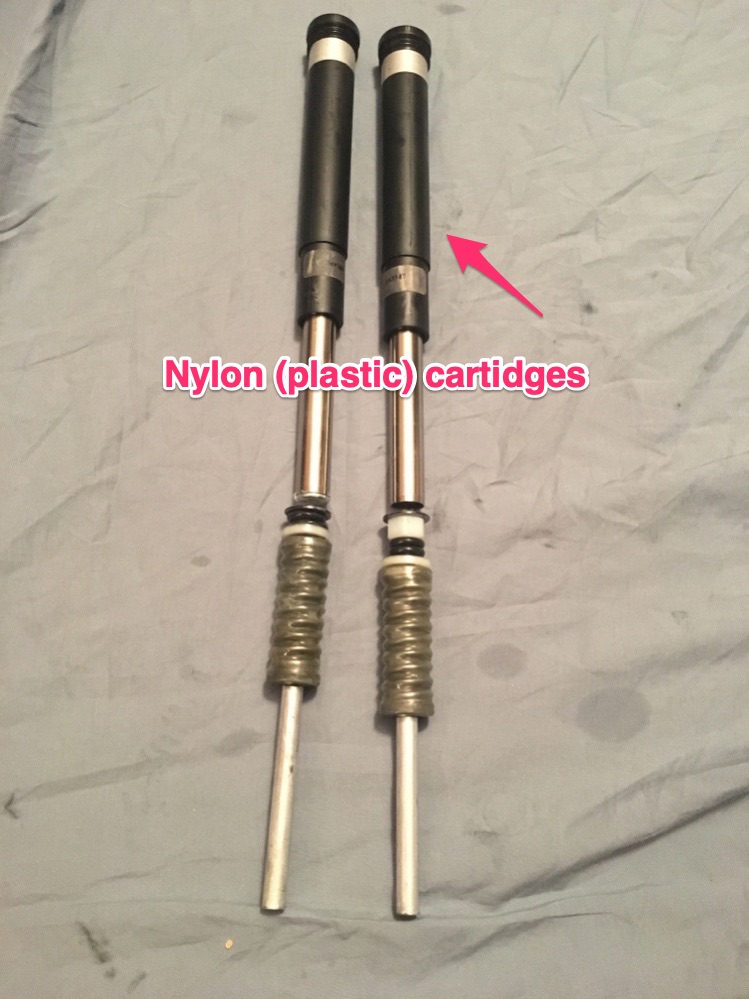
Not sure which one you need? Just remove the existing cartridge from your forks to check: 

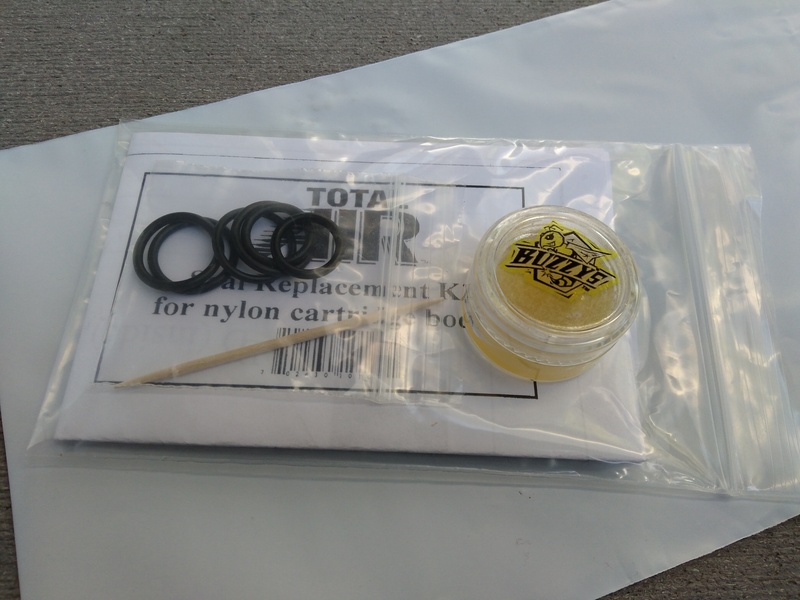
Choose the Nylon Body Kit If your UPPER cartridge body color is BLACK plastic

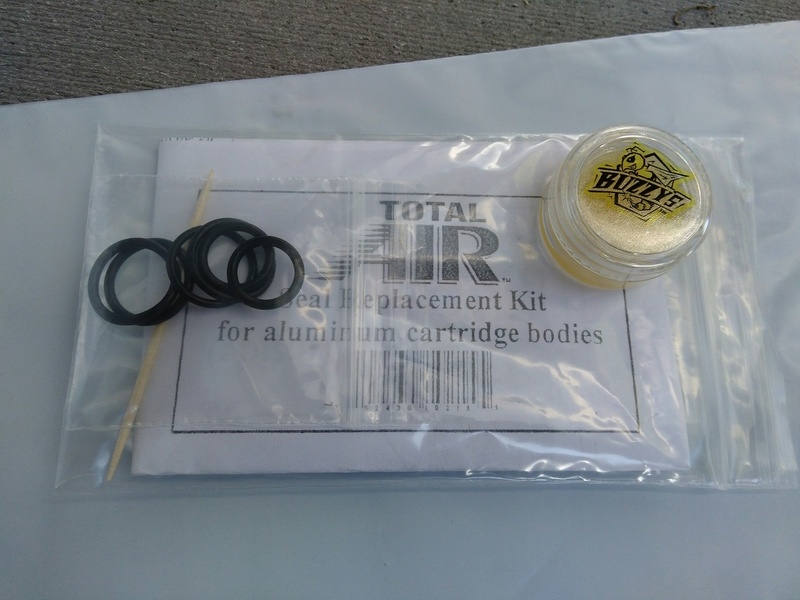
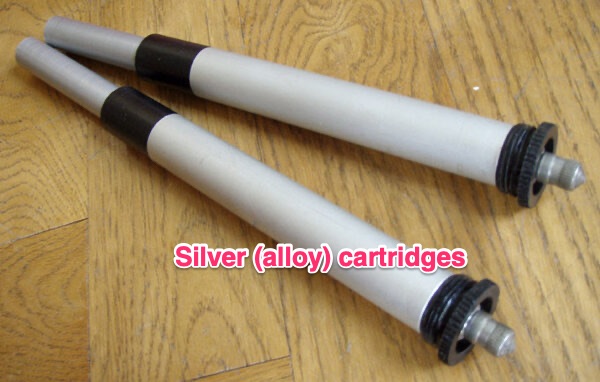
Choose the Alloy Body Kit If your UPPER cartridge body color is SILVER alloy


They are easy to install and come with all the seals necessary to get your cartridges working and holding air again. The kits include illustrated instructions and some Buzz’s Slick Honey as shown. One Kit will replace seals in two cartridges (enough for one fork)

FREE SHIPPING IN USA! $14 USD for International shipping worldwide (Sorry, USPS raised the International postage rates). I mail by standard USPS First Class Int’l Package service, so please allow 2-3 weeks for International deliveries.

*Int’l buyers: I can ship up to 2 packs in one parcel for the same shipping fee of $14. If you need more than 2, please send me a message by leaving me a comment at the bottom of this page so I can give you an invoice for payment. Your comment will be private.

Englund Total Air Cartridge Seal Kits (Complete Kit with Slick Honey lube) – Select Version during Checkout

Free Shipping in USA. +$14 USD for International buyers.

$19.99

Buy now

NEW OFFERING! I am now providing a version of this kit packaged without the Slick Honey lube. This allows me to mail the seals in a standard envelope. Shipping is Free in the USA and only $1.25 Internationally! No tracking is available with this seal-only kit and it may take a couple weeks for delivery by your local postal service.

Englund Total Air Seal Kit Only (seals and instructions only! no Slick Honey lube included!) – $14.99 USD – Free Shipping in USA. $1.25 for International buyers.

  Black plastic (Nylon) seal kit
  Silver (Alloy) seal kit

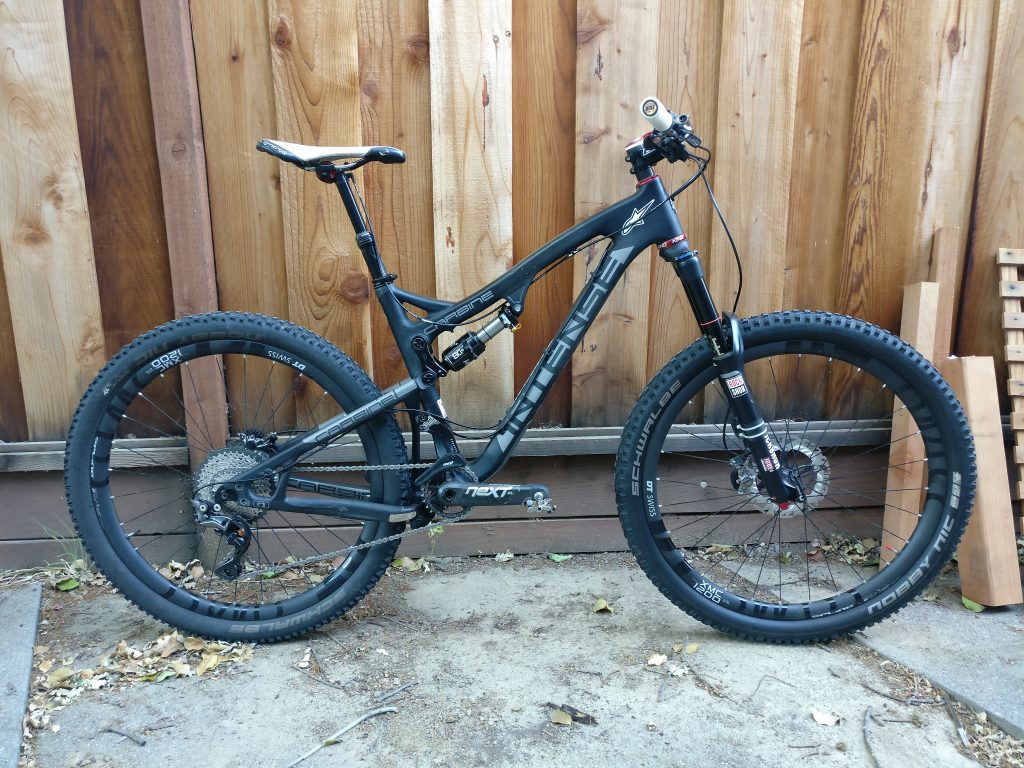
2014 Intense Carbine (2016 updates)

2016-06-21 19.49.36

Unfortunately, I lost some posts to my blog during a recent server switch. It used to have some ramblings about switching to 27.5/650b wheels, but that update got lost, so I’m posting about it again.

TL;DR, I went 27.5 not long after I cracked my 26″ Ritchey carbon rim in my other Carbine post. I never ended up building the Ritchey rear wheel with the rims I found on eBay. Instead, I bought a Pike 150 and a set of DT Swiss XRC1250 27.5″ carbon wheels and made the jump tp the 27.5″ revolution. As luck would have it however, I left the front wheel at the trailhead after hastily packing up after a ride. Doh! I went back within 30 minutes but it was gone and no amount of trying to find them turned up anything.

So what to do? Well, I ended up buying yet another set, then sold off the extra rear wheel for pennies on the dollar. Pretty costly lesson, in fact I could’ve bought a set of Enve’s at full price for the price I paid in the end(!).

After a few more happy months of riding, I found a deal on the newly announced replacement for the XRC1250’s, the XMC 1200’s. Nearly identical spec, but wider at 24.5mm internally (vs 21.5mm), plus squarely rated for full-on trail/enduro use (which I certainly aspire to be!). And since I can’t say no to a great deal, I picked them up and sold off the XRC’s.

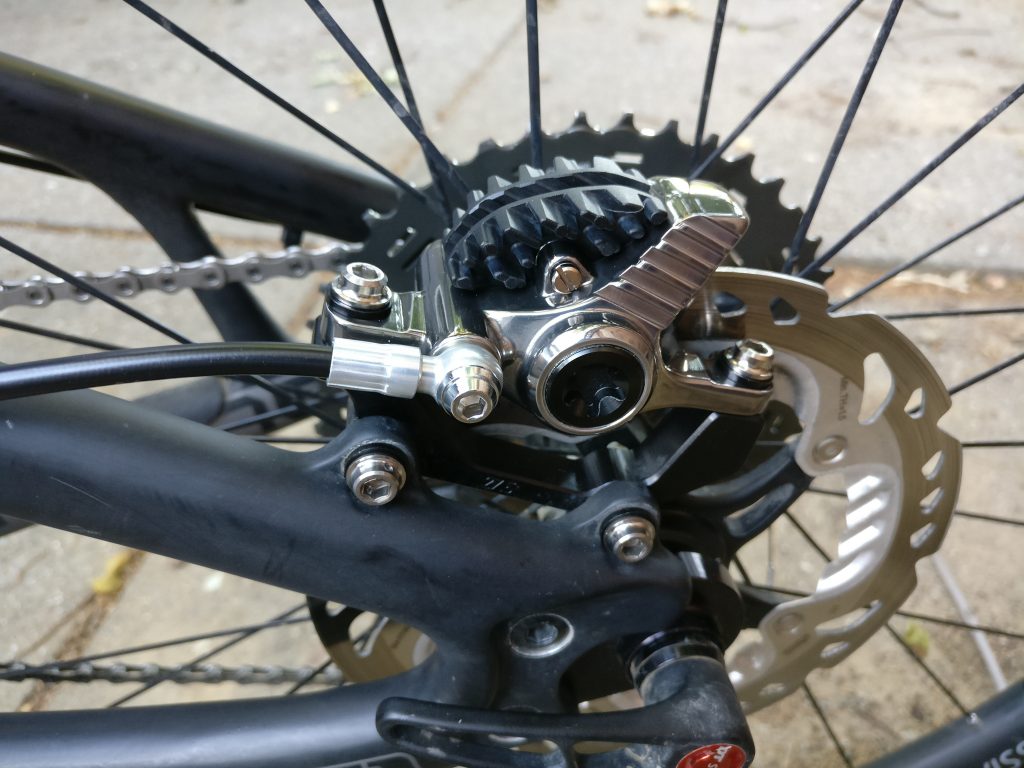
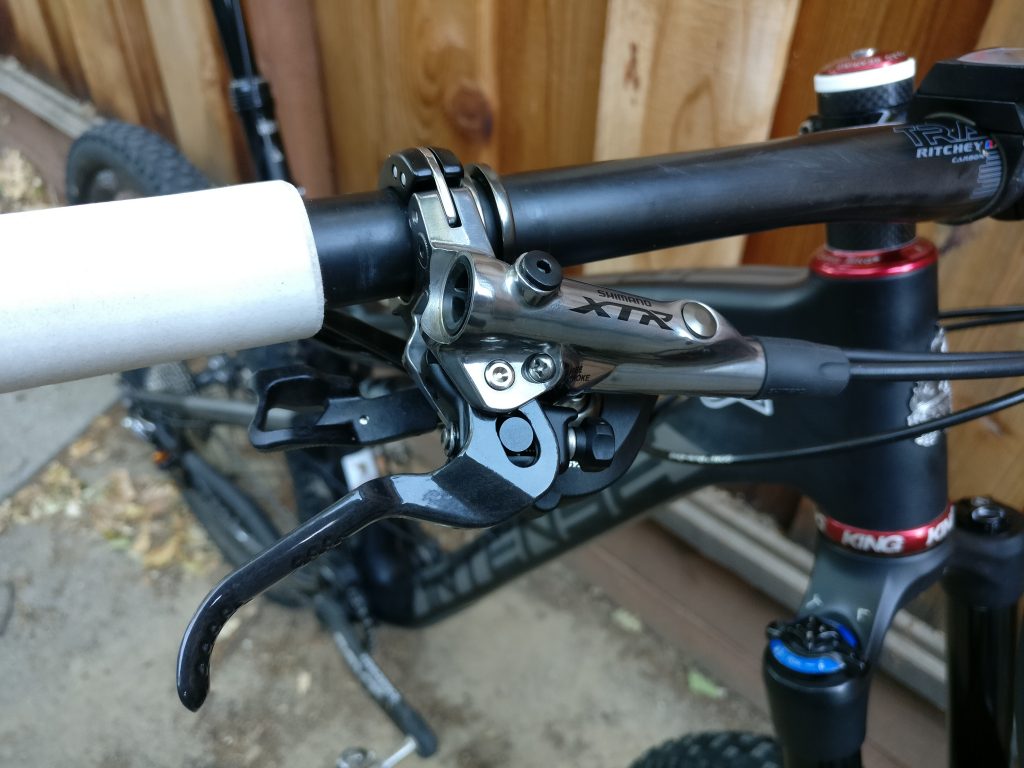
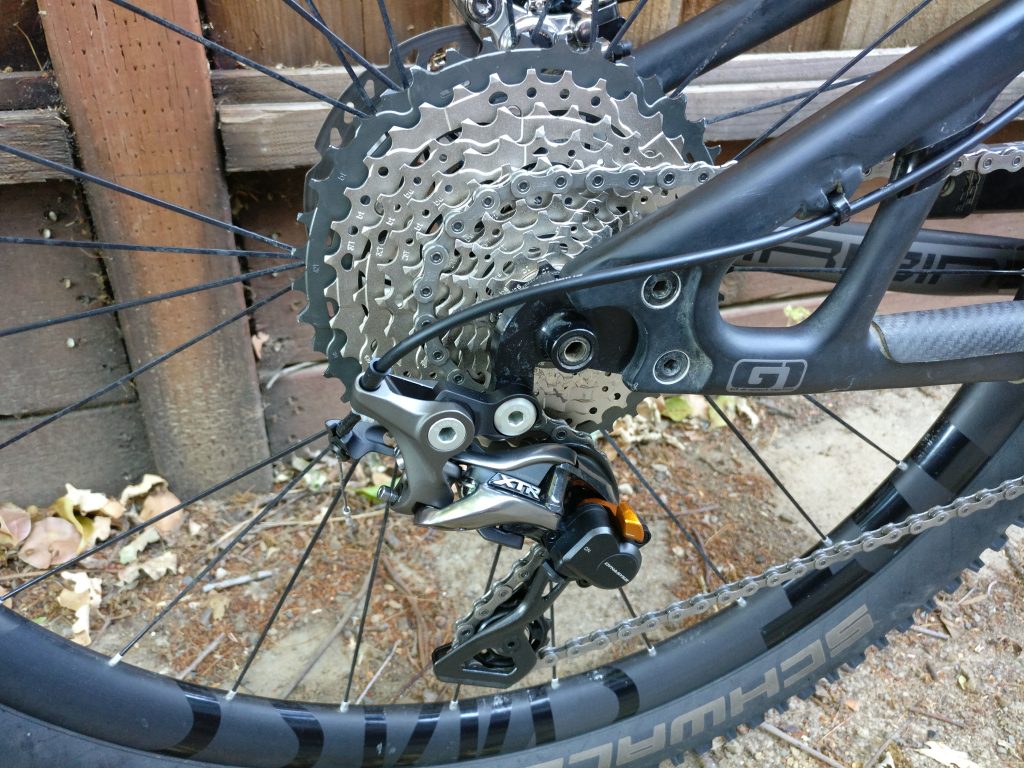
I also recently decided to go 11-speed and upgraded the whole drivetrain and brakeset with the primo XTR stuff (because why not? OK, I admit I skimped on the cassette and chain with XT…). I even used Gore Ride-On cabling for the dropper.

2016-06-21 19.50.45 2016-06-21 19.50.082016-06-21 19.49.55

I also found that my Fox CTD shock lost it’s lockout after a recent rebuild, so I was going to send it in to Fox, but after running the numbers with an upgrade to their EVOL air can, I started looking at other shock options instead.

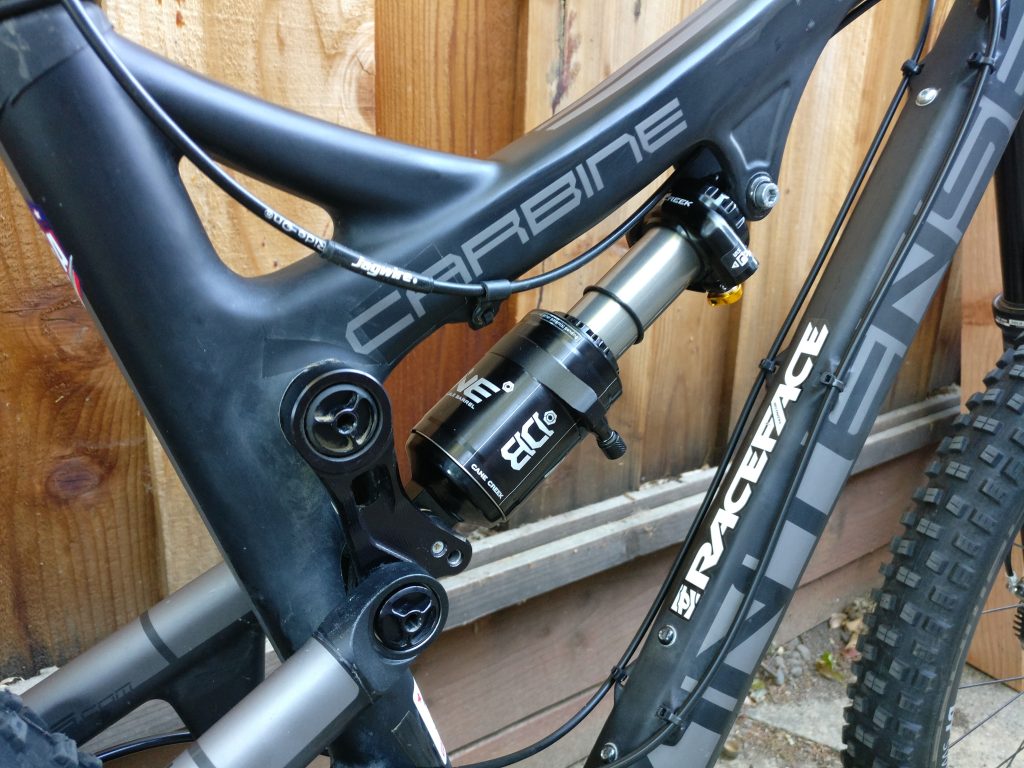
I finally settled on a new, take-off Cane Creek DB Inline I found locally on craigslist for $200(!). I’ve only had one ride on it so far and it was pretty unremarkable. I noticed I did not get full travel, so there are definitely some settings I need to adjust, which the Inline is well-known for. But I do see what all the fuss is about; you can literally tweak the feel of the shock for the exact terrain and your style of riding. The Fox didn’t let me adjust much of anything, and I guess I never thought about it much. But with all of the adjustability of the Inline, I’ve opened my eyes to what I have been missing and am looking forward to dialing it in…

2016-06-21 19.50.00

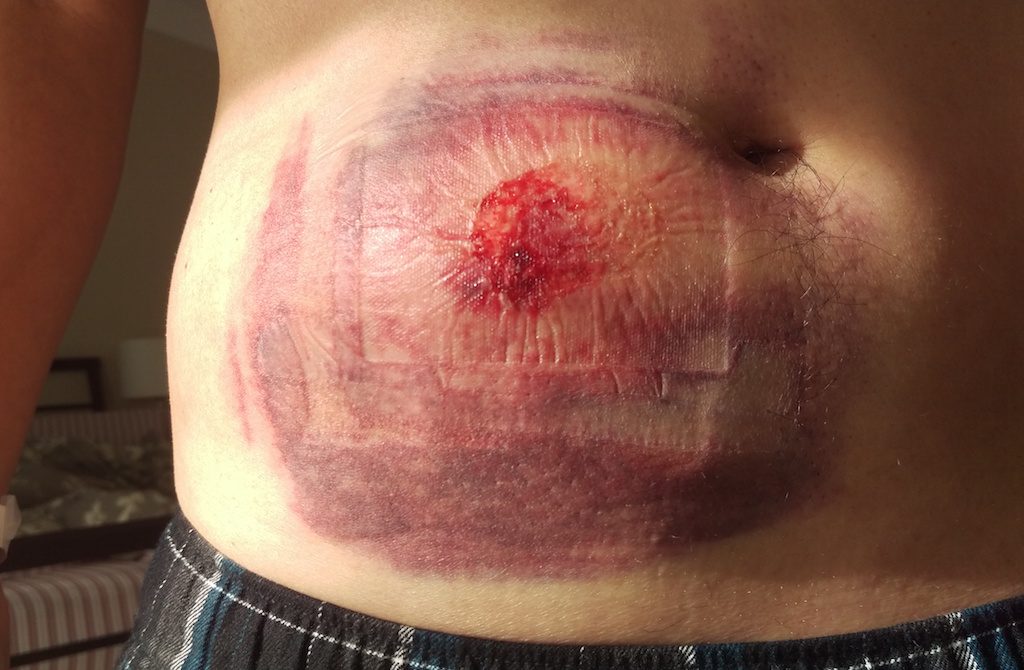
…after I heal up from a nasty OTB on the Inline’s maiden ride, when I washed out on a downward curve and the bars stabbed me right in my gut next to my belly button. Ouch, to say the least! Thankfully nothing too serious, just a massive hematoma.

2016-06-10 08.30.54

It’s been exactly 2 weeks since, and it’s cleared up nicely, but the hematoma remains…and rock hard. Hopefully it finds its way back into my body, but for now it’s keeping me off the bike.

I think I’ll be putting tennis balls on the ends of my bars now…


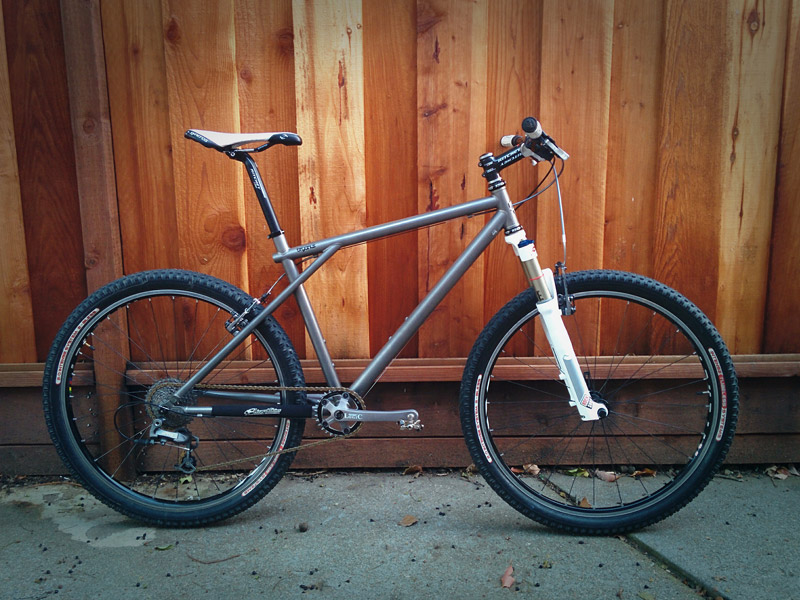
’97 GT Lightning Titanium

Another day, another Titanium GT! I just can’t seem to be able to pass these up when I come across them.

The Lightning was only made for two years in 1997 and 1998. They were built in Asia (Taiwan most likely) of [US] Sandvik ti tubing. The geometry is identical to the US-made Xizang. Apparently it was built to appeal to a more budget-conscious rider who wanted Ti, but couldn’t break the bank for the Xizang.

Whatever.

Turns out, the Lightning is actually harder to find than the Xizang due to only being available for 2 years. The weight is nearly identical to the Xizang as well. This 16″ frame weighed in at 3.54lbs (1600g).

I’ve always liked the satin finish of the Lightning, so when i found one perusing the Vintage section on mtbr.com, I said, “what the heck” and contacted the seller and worked out a deal.

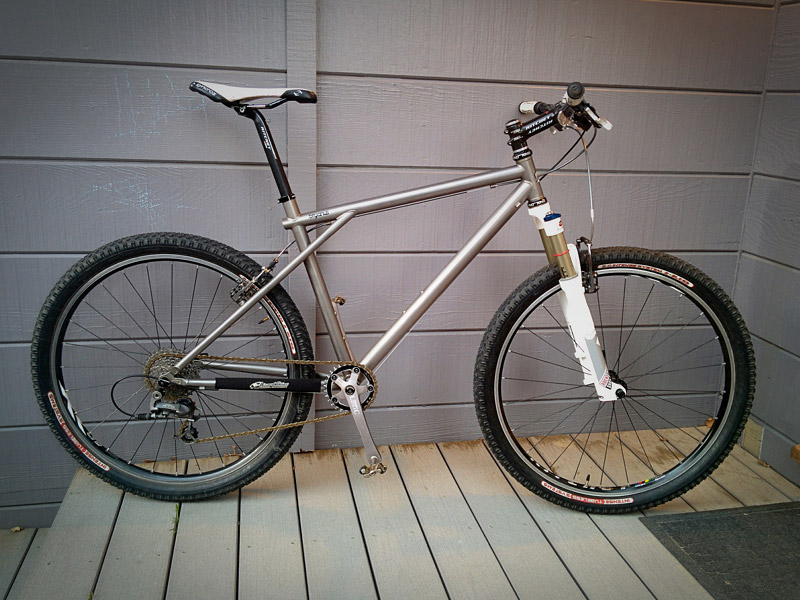
You may notice a lot of the same parts being transferred over from previous bikes. This one inherited everything from the Dekerf. I’m just waiting on some NOS GT decals and a 31.8mm Paul ChainKeeper chainguide and it’ll be ready to ride. If I like it, I am planning on swapping the tires and saddle for something in the superlight category, which should bring the final weight down to around 20lbs (it’s ~21.5 w/pedals currently).

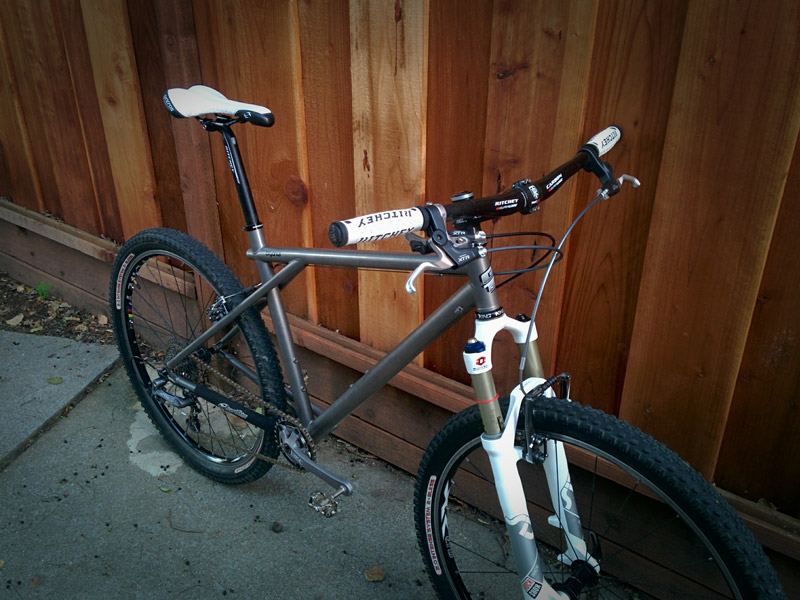
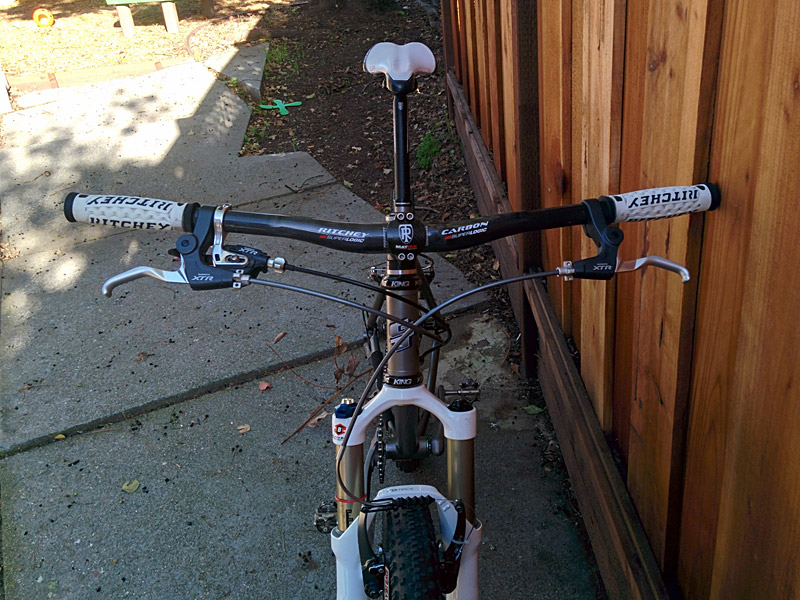
If I don’t like it, then I think this is it for me and vintage bikes. I will sell this build along with the Dekerf frame, and find myself a modern superlight 29er hardtail (although the retro in me is really digging the Ritchey P-29er…)

image
image
image
image

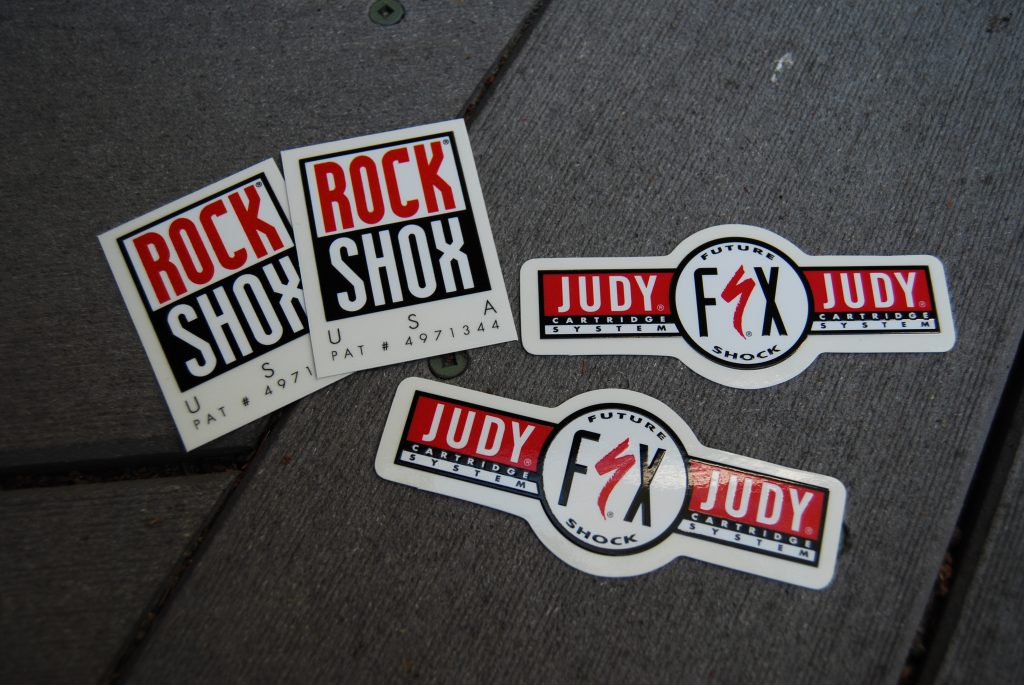
Vintage/Retro/Classic! Specialized RockShox Judy FSX Replacement Fork decals

I sell these on eBay, but I’ll cut them out and sell directly and give you a little discount if you buy from me direct for $11.00 USD (you save $1.00!)

Apparently SRAM thinks my decals are TOO GOOD! They had my listings removed on eBay after almost 10yrs(!) of selling these to support the VRC crowd!

2024 Update! All Decals are available!

Get them while they last. I won’t be making any more once my current run is finished. When they’re gone, they’re gone!

Shipping is FREE in USA (2-3 bus. day delivery). $1.25 Int’l First Class Mail (allow 1-2 week delivery time)

2x Lower Leg decals only ($11). FSX lower leg decals only:

image
Complete Upper and Lower leg decal set ($18). Includes the Rock Shox logo upper leg decals and FSX leg decals:


image


Check out my eBay feedback for these decals! (click for larger version)

Description from my [now banned] eBay auction:

Specialized Rock Shox Judy FSX lower leg fork decals only! NEW!
 
You are looking at a set of incredibly high-quality reproduction decals for your vintage Rock Shox Judy FSX forks!
 
Like you, I had a vintage bike to restore, and the original decals on my Judy forks were toast! I wasn’t happy. It was the one thing that kept my bike from being “perfect” again.
 
So I took it upon myself to rebuild, recreate, redesign, the original Rock Shox Judy decals. I’m a professional graphic designer, so I knew I could do it. After many, many hours of carefully measuring the original decals, scanning, fixing and tweaking, here is the final result. It’s perfect. Even more perfect than the original decals ever were. They are the exact size of the originals. The perfect finishing touch.

Bring your tired, beaten forks back to their former glory!

These decals are truly the highest quality reproduction decals you will ever find anywhere. Each detail was painstakingly recreated with laser-sharp perfection. Everything was measured and aligned to be a perfect match with the original.
On top of all this, I went the extra mile (and expense!) and the “FSX” decals are custom “die cut”, which means they are pre-cut and shaped just like the originals. Even better, the corners of my FSX decals are rounded to prevent the peeling that was so common to the original decals.

These decals are clear, just like the originals.

How these decals are printed
 
The decals are printed using the highest quality silk-screening techniques. Silkscreen printing is an incredibly high-end method with which to print stickers. As far as sticker printing goes, silkscreen is simply the best the way to produce an extremely high caliber, high quality sticker. Once you begin to understand the silkscreen process and see the results of the printing medium, you will quickly realize that in terms of quality, there is no contest.
 
Silkscreen printing is essentially a stenciling technique, where a design is imposed on a screen of silk or other fine mesh, with blank areas coated with an impermeable emulsion. Ink is forced through the mesh with a squeegee onto the printing surface, which in our case is an adhesive backed vinyl. The result is an extremely thick, weatherproof, waterproof sticker with an effective outdoor capability that is measured by years. (The outdoor capability of a digitally printed sticker of the same design is measured by weeks.)
 
The highest quality. Period.
 
  • Thick Ink. At least 2-3 times thicker than other silkscreen stickers and 10x-20x thicker than digitally printed stickers.
  • 100% UV Protection with Multiple Passes. Each full-color sticker is silkscreened onto a thick vinyl surface with 4 thick coats of ink, and 3 thick coats of clear gloss with 100% UV protection.
  • Weather proof and waterproof. Effective outdoor capability is 2000-3000% higher than Digital/Flexo materials.
  • Photo Realistic Printing. No visible “dots” or line screen. Continuous tone, super vibrant colors.
  • Extreme durability. Minimum 3-5 year effective capability against any weather. Actual lifetime should be substantially higher since you aren’t riding everyday! Extremely durable in extreme conditions (like mountain biking!). Silkscreen stickers are the only way to go if you are looking for durability.
 
WORLDWIDE SHIPPING!
  • Free Shipping in USA! Delivery within 2-3 business days by First Class Mail
  • International shipping: USD $1.25 by First Class International letter. Please allow up to 14 business days, but usually about 7-10 business days.
 

DT Swiss 240s 142x12mm Rear Hub/Axle Conversion

Since I’ve decided to stick with 26er’s for a while, I decided it was worth it to switch the rear hub of my Ritchey Superlogic carbon wheelset from standard 135mm QR to the new 142x12mm thru-axle design by Syntace (aka X-12).

The cool thing about the Superlogic wheelset is that it uses de-badged DT 240s hubs, which can be converted to any axle design in use today. Unfortunately, mine is a 2009 model, so instead of just popping on new end caps, I had to swap out the whole axle in order to fit the 12mm thick thru-axle.

Interestingly, I couldn’t find any information on how to do this online. I had some ideas on how to do it, but I was surprised that there were no videos or other write-ups dealing specifically with the rear axle swap on these hubs.

Here’s how to do it:

  1. Remove the wheel, cassette and rotor (if centerlock).
  2. Firmly grasp the freehub body and pull hard. Wiggle it a bit as you pull if it doesn’t come loose. Be careful as you pull it, as there is a spring inside the freehub body that will likely fall out once the freehub body is removed. It may feel like the freehub body isn’t going to come out, but trust me, if you have a DT hub, it WILL come off! The freehub body is kept in place by the end cap which snaps into place, so that is what you are actually trying to break free.
  3. Once the freehub body is off, locate the spring and place somewhere safe. Now, remove the internal ratchet pieces from the hub, the axle spacer next to the hub bearing, and the hub spring. Take note of how these all fit back together. Basically, the smaller ends of the springs point inwards towards each other during reassembly.
  4. Now is a good time to clean off the parts you just pulled out.
  5. To get the axle out, insert a thin wooden dowel through the drive-side axle and use a hammer to tap out the end cap of the non-drive side.
  6. Now, place the wheel onto a padded surface drive-side up (I used my shop floor mat). Insert a stubby screw driver into the axle and use a hammer to tap the axle out. The stubby screwdriver protects the axle as you hit it with the hammer, rather than striking the axle directly. It will take some firm blows to free the bearing, but you will know right away once the bearing is free. Once it is free, lift up the wheel and the axle should come out with a  few more light taps.
  7. With the axle out, remove the bearing and clean as necessary.
  8. Now, slide the bearing onto your new axle and put a little grease onto the sides of the bearing and also the hub to ease in pressing the bearing back into place.
  9. At this point, your axle is loosely inserted into the non-drive side. Re-assemble the freehub side. Use a light-weight oil on the ratchet parts. Chris King Ring lube is recommended, but I don’t have any of that, so I have heard you can use something like Finish Line Cross Country wet lube or even Tri-flow. The viscosity is important; too thick and your ratchet may not engage properly. I used some Tri-flow in mine. FWIW, the lighter the viscosity will also result in your freewheel clicking more loudly. Thicker stuff will muffle the sound a bit.
  10. Once the axle/hub is put back together loosely, assemble the wheel using the dropouts for your 142 setup and insert the thru-axle. Start tightening the axle, and you will see that the non-drive side bearing is being gently pressed into the hub shell. Tighten until you can’t tighten anymore.
  11. Install the dropouts onto your frame and put your cassette/rotor back onto your wheel. Install your wheel and tighten the thru-axle firmly. I had to re-adjust my rear caliper a bit due to some slight rubbing, but after that you are done!

2012 BMC SL01 RoadRacer 54cm

image
image
image

Even though I don’t really ride my road bike much, I still wanted to keep it around for days I couldn’t do a full MTB ride. I came across a great deal on this new ‘12 BMC RoadRacer with 105 Group on eBay and took a risk in being able to sell my old frame to cover the costs. I swapped over all of my old parts and sold off my old Omega Ti frame and the new 105 set to squeeze out a small profit in the end. I dropped over a pound vs the Omega and got an updated frameset to boot. 15.68lbs without pedals.